↓ Download free infographicSave to your device or print for practice.
Explore more ways to practise in the Golf Practice Made Fun App.
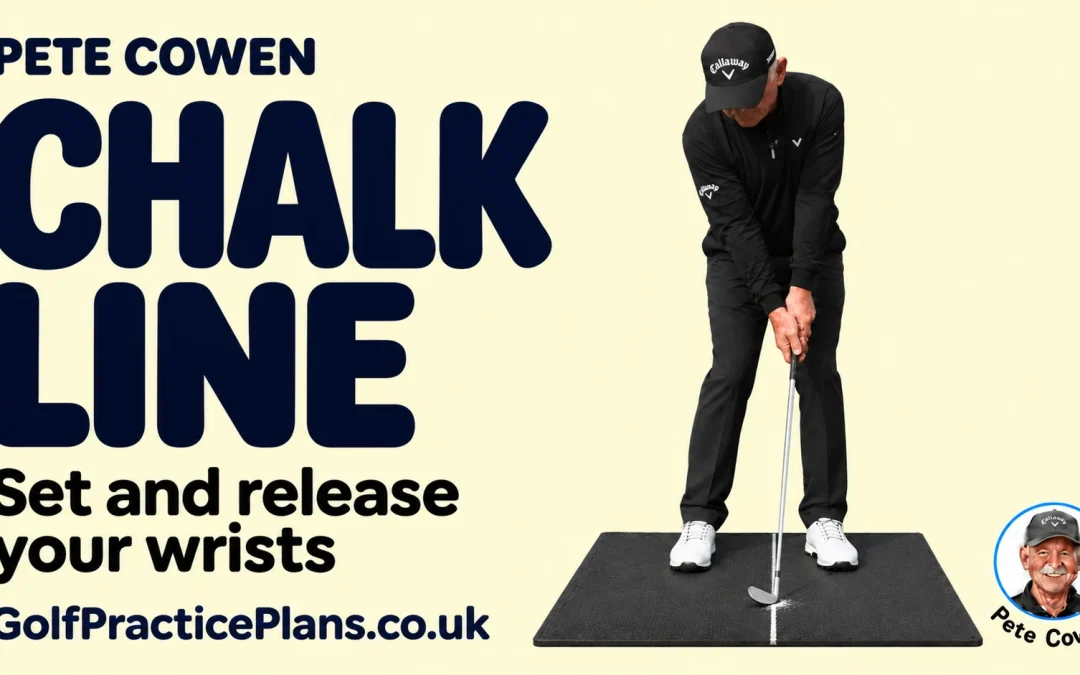
Give your wrist action a visible task. Use a chalk line to practise setting and releasing the wrists, brushing the mat with the wedge’s sole.
Start with drawing the line, practise your wrist set, then release and brush.
Watch the Drill
Use a suitable rubber practice mat and small, controlled swings without a ball. Allow space for the club. These instructions describe a right-handed golfer; reverse the sides if you play left-handed.
Step 1

| Action | What to do |
|---|---|
| Make your reference | Draw a straight chalk line on the rubber mat. |
| Position the line | Place it beneath your shirt buttons and belt buckle, extending in front of your feet. |
Step 2
| Action | What to do |
|---|---|
| Swing back | Make a small backswing and set your wrists. |
| Check the plane | Rehearse the shaft on a plane of about 45 degrees, as shown in the video. |
Your focus: Feel wrist set and release
Step 3
| Action | What to do |
|---|---|
| Release beneath you | Let the wrists release beneath your shirt buttons and belt buckle. |
| Brush the line | Use the club’s sole to remove the chalk. Avoid pushing the hands far ahead or releasing behind you. |
| Reset | Refresh the chalk as needed before the next attempt. |
Your 18-Attempt Challenge
Our practice format: complete two sets of nine attempts. Each small swing counts, whether or not you remove the chalk. Pause after nine, record your score and choose one focus for the second set.
| Score | When to award it |
|---|---|
| 1 point | You brush chalk away at the line with a controlled swing and finish balanced. |
| 0 points | You miss the line, lose control or lose your balance. |
Record one total out of 18. Refresh the line whenever it becomes unclear, keeping the same setup for each attempt. Treat the chalk mark as feedback for your next rehearsal rather than a reason to swing harder.
FAQs
What equipment do I need?
Wedge, chalk + rubber mat.
How do I set up this drill?
Draw a straight chalk line on the rubber mat. Place it beneath your shirt buttons and belt buckle, extending in front of your feet.
What should I focus on during practice?
Make a small backswing and set your wrists. Rehearse the shaft on a plane of about 45 degrees, as shown in the video.
How should I record my practice?
Let the wrists release beneath your shirt buttons and belt buckle. Use the club’s sole to remove the chalk. Avoid pushing the hands far ahead or releasing behind you. Refresh the chalk as needed before the next attempt.
What should I keep in mind when practising?
Choose one cue for the whole set: “set, release, brush”. Take a moment to look at the mark after each attempt, then reset before you continue. After nine, write down one thing that helped you repeat the routine. Carry that same cue into the second set so you have a useful comparison, rather than eighteen different experiments.
What drill do you recommend I do next?
Try Pete Cowen Towel-Wringing Drill next to explore equal and opposite hand pressure in a slow rehearsal.
You could also use One Arm Wedge Drill to compare lead-hand-only, trail-hand-only and two-handed wedge pitches. For another focused practice task, try Goldilocks Wedge Drill to build distance feel with short, long and on-target wedge shots.
Give your next practice a purpose.
Find illustrated drills, save your favourites and record your practice in the Golf Practice Made Fun App.
Try the App Free ↗14 days free · No card required