
Browse by category
DRILL OVERVIEW
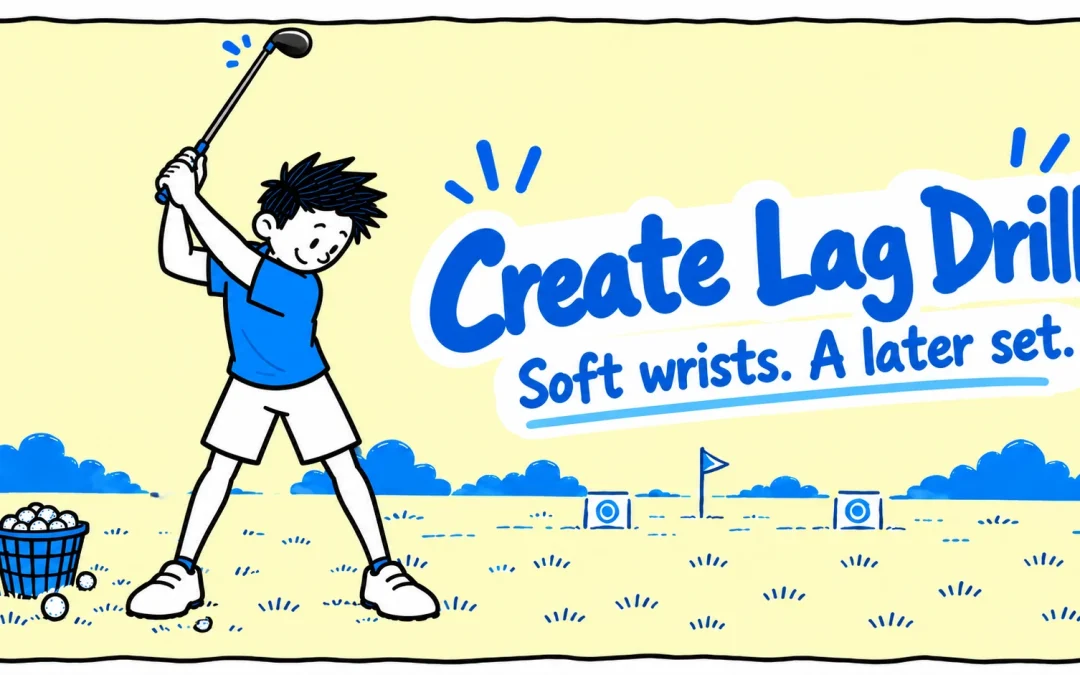
Create Lag Drill: Practise a Later Wrist Set
Your drill at a glance
This drill is from the Golf Practice Made Fun App.
Changing when you set your wrists helps you explore the timing of your swing. This rehearsal draws attention to how the arm-and-shaft relationship develops as you change direction. Testing the later-set feeling slowly can help you notice unnecessary wrist tension and find a release you can control, rather than chasing the biggest possible lag angle.
Step 1. Watch the later wrist-set feel
Watch the original demonstration. Notice the upright club in the backswing and the change in the arm-and-shaft angle as the downswing begins.
Step 2. Rehearse a later wrist set
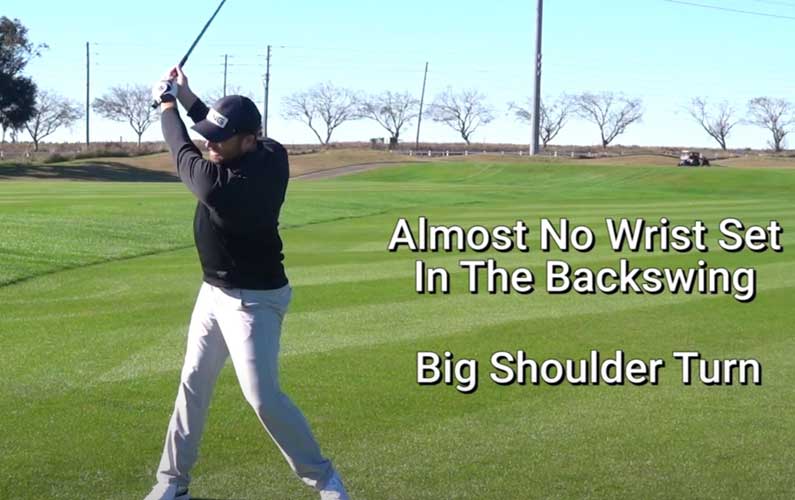
Hold the club with both hands and make a slow backswing. Allow a comfortable shoulder turn and arm swing, with the feeling of less deliberate wrist hinge on the way back. The club may feel more upright at the top.
Keep your grip secure and your wrists responsive. “No wrist set” is the lesson’s exaggerated practice feel; it does not mean locking your wrists or stretching for a longer backswing.

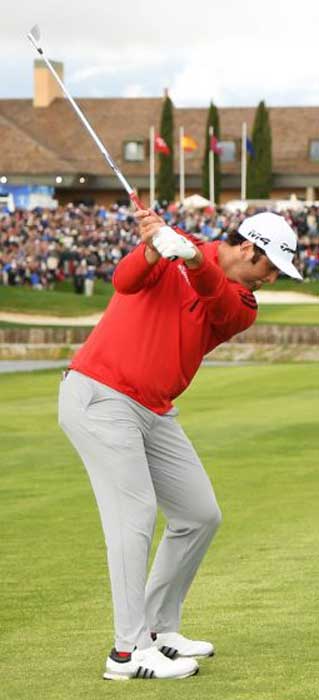
Use your own comfortable movement rather than trying to reproduce his swing exactly.
Let the angle develop as you change direction
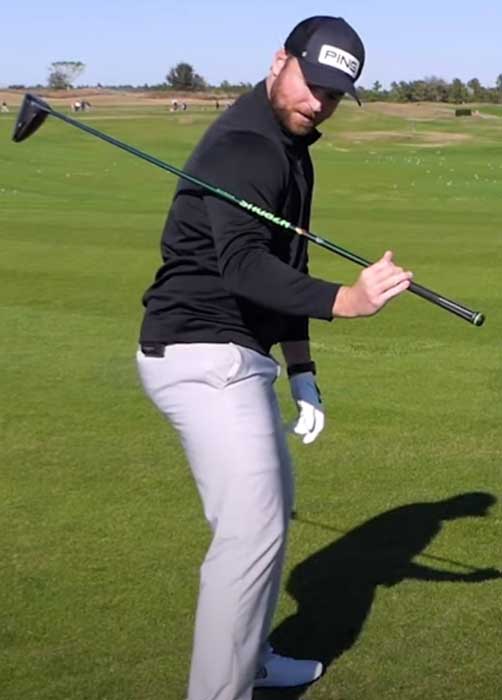
From your slow backswing, begin an easy downswing and notice how the relationship between the lead arm and shaft changes. For a right-handed golfer, the lead arm is the left arm; for a left-handed golfer, it is the right arm.
The original lesson uses the feel of the club approaching the back of the shoulder, rather than the top of it. Treat this as an exaggerated direction cue. Keep the club clear of your body and avoid trying to hit your shoulder or hold the angle through impact.
| Practice feel | What to notice |
|---|---|
| Less deliberate hinge going back | A comfortable turn and a more upright club. |
| Soft wrists changing direction | The arm-and-shaft relationship develops as you move. |
| An easy normal shot | Control, comfortable contact and a balanced finish. |
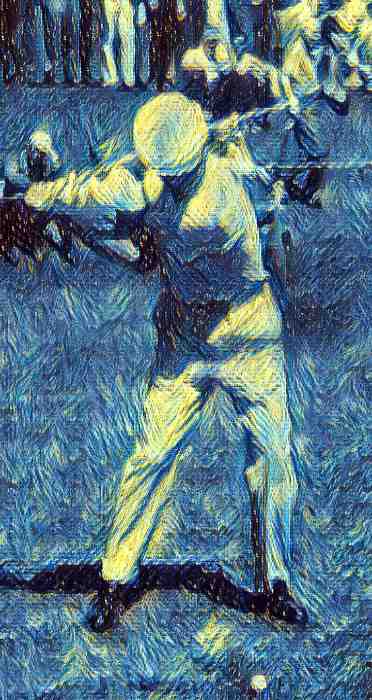
Compare the four original lag positions
Compare the lead arm and shaft during the downswing, allowing for different camera angles. Phil Mickelson’s left-handed swing is mirrored relative to a right-handed golfer.



Take the feeling into a gentle shot
Make one slow rehearsal, then play an easy shot using your normal swing. Keep the cue “Soft wrists, easy change of direction.” Pay attention to comfort and control rather than chasing the largest possible angle.
Step 3. Complete your round

Complete 18 controlled repetitions. Each repetition consists of one slow later-wrist-set rehearsal, followed by one easy normal swing. Reset before the next repetition.
If you’re using the Golf Practice Made Fun App, tick one box in your Practice Round after each completed repetition. Your target is 18 repetitions completed; count the rehearsal-and-normal-swing pair as one repetition.
You can complete the round without a ball. At the range, make the normal swing a gentle shot. Add one short note about whether the later-set feeling helped you keep your wrists soft and your swing controlled.
| Round | What to do |
|---|---|
| First nine | Complete nine repetitions, each pairing a slow later-wrist-set rehearsal with one easy normal swing. |
| Second nine | Pause, then repeat nine pairs without forcing the wrists. Count each pair once. |
| Record | Record repetitions completed out of 18 and one note about wrist softness and control. |
George’s Conclusion
Start slowly and treat this as an experiment with timing. Find the later-set feeling, then return to an easy normal swing. The pro photographs help explain lag; your practice task is to complete 18 comfortable repetitions without forcing a position.
Explore another feel with the 2 Minute Lag Drill or Triple Lag Drill.
MAKE THE NEXT BUCKET COUNT
Pick a card. Practise with purpose.

Browse by category
DRILL OVERVIEW
Create Lag Drill: Practise a Later Wrist Set
Your drill at a glance
This drill is from the Golf Practice Made Fun App.
Changing when you set your wrists helps you explore the timing of your swing. This rehearsal draws attention to how the arm-and-shaft relationship develops as you change direction. Testing the later-set feeling slowly can help you notice unnecessary wrist tension and find a release you can control, rather than chasing the biggest possible lag angle.
Step 1. Watch the later wrist-set feel
Watch the original demonstration. Notice the upright club in the backswing and the change in the arm-and-shaft angle as the downswing begins.
Step 2. Rehearse a later wrist set
Hold the club with both hands and make a slow backswing. Allow a comfortable shoulder turn and arm swing, with the feeling of less deliberate wrist hinge on the way back. The club may feel more upright at the top.
Keep your grip secure and your wrists responsive. “No wrist set” is the lesson’s exaggerated practice feel; it does not mean locking your wrists or stretching for a longer backswing.
Use your own comfortable movement rather than trying to reproduce his swing exactly.
Let the angle develop as you change direction
From your slow backswing, begin an easy downswing and notice how the relationship between the lead arm and shaft changes. For a right-handed golfer, the lead arm is the left arm; for a left-handed golfer, it is the right arm.
The original lesson uses the feel of the club approaching the back of the shoulder, rather than the top of it. Treat this as an exaggerated direction cue. Keep the club clear of your body and avoid trying to hit your shoulder or hold the angle through impact.
| Practice feel | What to notice |
|---|---|
| Less deliberate hinge going back | A comfortable turn and a more upright club. |
| Soft wrists changing direction | The arm-and-shaft relationship develops as you move. |
| An easy normal shot | Control, comfortable contact and a balanced finish. |
Compare the four original lag positions
Compare the lead arm and shaft during the downswing, allowing for different camera angles. Phil Mickelson’s left-handed swing is mirrored relative to a right-handed golfer.
Take the feeling into a gentle shot
Make one slow rehearsal, then play an easy shot using your normal swing. Keep the cue “Soft wrists, easy change of direction.” Pay attention to comfort and control rather than chasing the largest possible angle.
Step 3. Complete your round
Complete 18 controlled repetitions. Each repetition consists of one slow later-wrist-set rehearsal, followed by one easy normal swing. Reset before the next repetition.
If you’re using the Golf Practice Made Fun App, tick one box in your Practice Round after each completed repetition. Your target is 18 repetitions completed; count the rehearsal-and-normal-swing pair as one repetition.
You can complete the round without a ball. At the range, make the normal swing a gentle shot. Add one short note about whether the later-set feeling helped you keep your wrists soft and your swing controlled.
| Round | What to do |
|---|---|
| First nine | Complete nine repetitions, each pairing a slow later-wrist-set rehearsal with one easy normal swing. |
| Second nine | Pause, then repeat nine pairs without forcing the wrists. Count each pair once. |
| Record | Record repetitions completed out of 18 and one note about wrist softness and control. |
George’s Conclusion
Start slowly and treat this as an experiment with timing. Find the later-set feeling, then return to an easy normal swing. The pro photographs help explain lag; your practice task is to complete 18 comfortable repetitions without forcing a position.
Explore another feel with the 2 Minute Lag Drill or Triple Lag Drill.
MAKE THE NEXT BUCKET COUNT
Pick a card. Practise with purpose.