
Browse by category
DRILL OVERVIEW · PUTTING CARD 30
Trail Index Finger: Try a Lighter Grip
Your drill at a glance
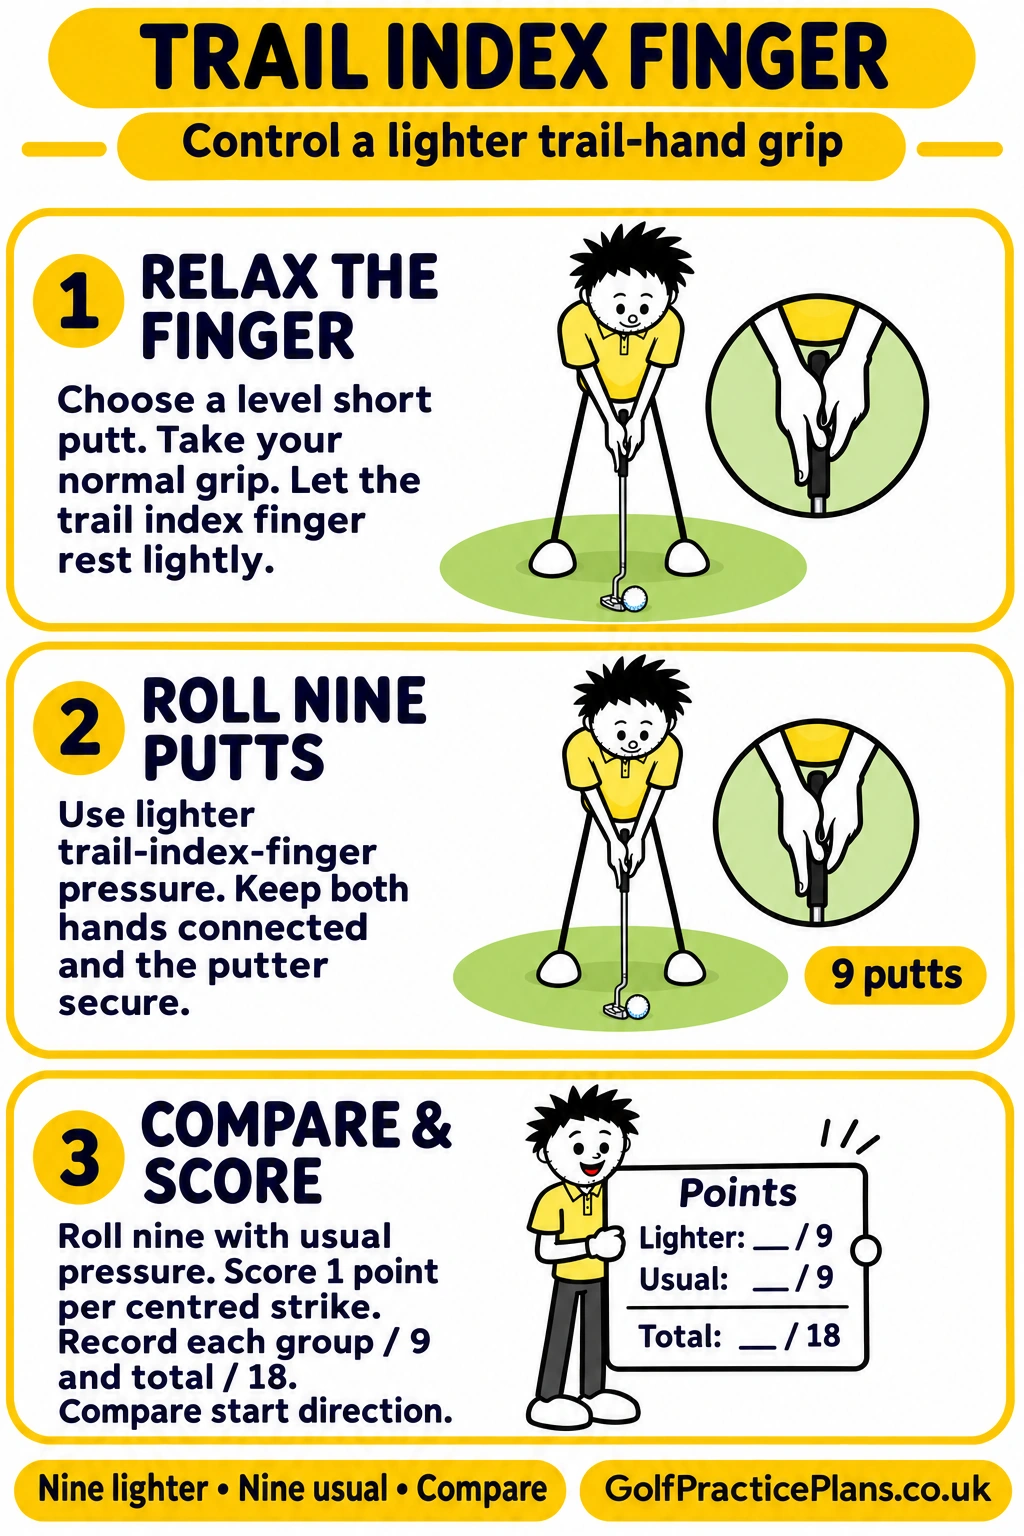
This is Putting card thirty, Trail Index Finger: Try a Lighter Grip, in the Golf Practice Made Fun App.
Find out what a small change in finger pressure does to your putting. Let your trail index finger rest lightly on the handle for nine putts, then roll nine more with your usual pressure. Compare centred contact and the direction the ball starts.
Keep both hands connected and the putter secure throughout. You are relaxing one finger’s squeeze, rather than giving the putter permission to escape.
Jump to relax the finger, roll nine lighter putts or compare and score.
Watch the trail-finger lesson.
Todd Kolb discusses how the trail index finger and trail hand influence putting control in this US GOLF TV lesson. His trail-finger explanation begins at 0:46.
Step 1. Relax the finger.
| Action | What to do |
|---|---|
| Choose a level short putt | Pick a short putt on level ground. Use the same starting position for both groups. |
| Take your normal grip | Keep both hands connected to the handle and settle into your usual putting stance. |
| Find the trail index finger | For a right-handed golfer, this is the right index finger; for a left-handed golfer, it is the left. |
| Ease the squeeze | Let that finger rest lightly on the handle instead of squeezing. Keep the putter secure. |
Make the change small and comfortable. Keep the finger in contact with the grip and avoid forcing it into an awkward position.
Step 2. Roll nine lighter putts.
| Action | What to do |
|---|---|
| Roll nine putts | Use the lighter finger pressure for all nine attempts. |
| Keep both hands connected | Maintain your two-handed grip throughout each stroke. The handle should not slip. |
| Notice the strike | After each putt, judge whether you struck the ball from the centre of the putter face. |
| Score the group | Award one point for each centred strike. Record this lighter-pressure group out of nine. |
Notice the ball’s start direction as well as the contact. Keep that observation separate from the points, which are awarded for centred strikes.
Step 3. Compare and score.
| Action | What to do |
|---|---|
| Return to usual pressure | Roll nine more putts with the grip pressure you normally use. |
| Count centred strikes | Again, award one point per centred strike and record the group out of nine. |
| Compare the two groups | Look at the centred-strike scores and the start direction. Notice which pressure gives you more consistent results without the putter slipping. |
| Record your total | Add both groups for your total out of 18. Higher points mean more centred strikes. |
Your practice record
| Group | Record |
|---|---|
| Lighter finger pressure | ___ / 9 |
| Usual finger pressure | ___ / 9 |
| Total centred strikes | ___ / 18 |
| Start-direction notes | Lighter: ___ Usual: ___ |
One point means a centred strike. Holing a putt or starting it on line does not add a separate point. Use the two group scores to compare the pressure change.
George’s Practice Tip.

Change the finger pressure, then let the stroke happen. Avoid making a different swing to manufacture a better result. The useful discovery is how each pressure feels and performs with your normal putting action.
For another contact check, try the Putter-Head Gate. To explore the trail hand in a separate exercise, try the Trail-Hand Putting Drill.
MAKE THE NEXT BUCKET COUNT
Pick a card. Practise with purpose.
